|
Suisse Pliage — Installation guide INSTALLATION OF A FLAT PARAPET COPINGTechnical data sheet — step-by-step installation for building professionals. |
|
📋 Technical data sheet Complete installation procedure for a flat parapet coping with clip-on system on grooved brackets — from substrate preparation to finishing. |
🔧 Required tools
|
📐 General view 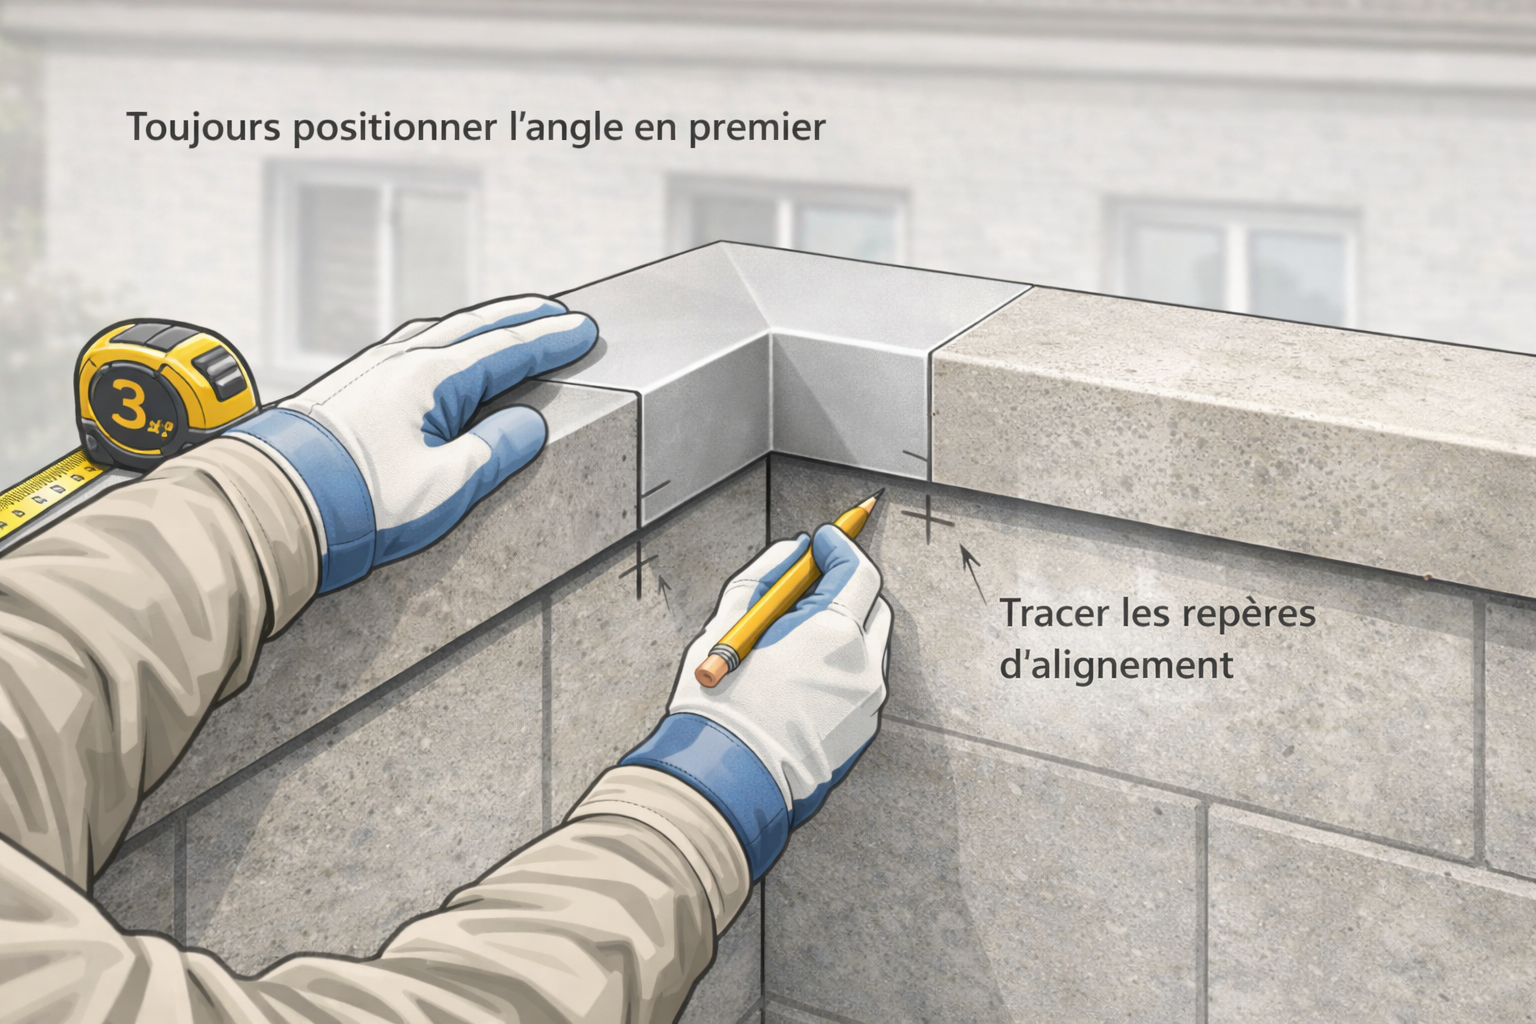 |
|
Part 01 ⚒ BRACKET INSTALLATION |
|
|
|
3. Bracket positioning |
|||
|
Position the grooved brackets according to the markings. Check alignment and plumb before drilling.
|

|
|
|
💡 Practical info — Grooved bracket spacing ► Every 1.50 m for copings of 3 m in length ► Every 1.00 m for copings of 2 m or less |
|
Part 02 🏠 COPING INSTALLATION |
|
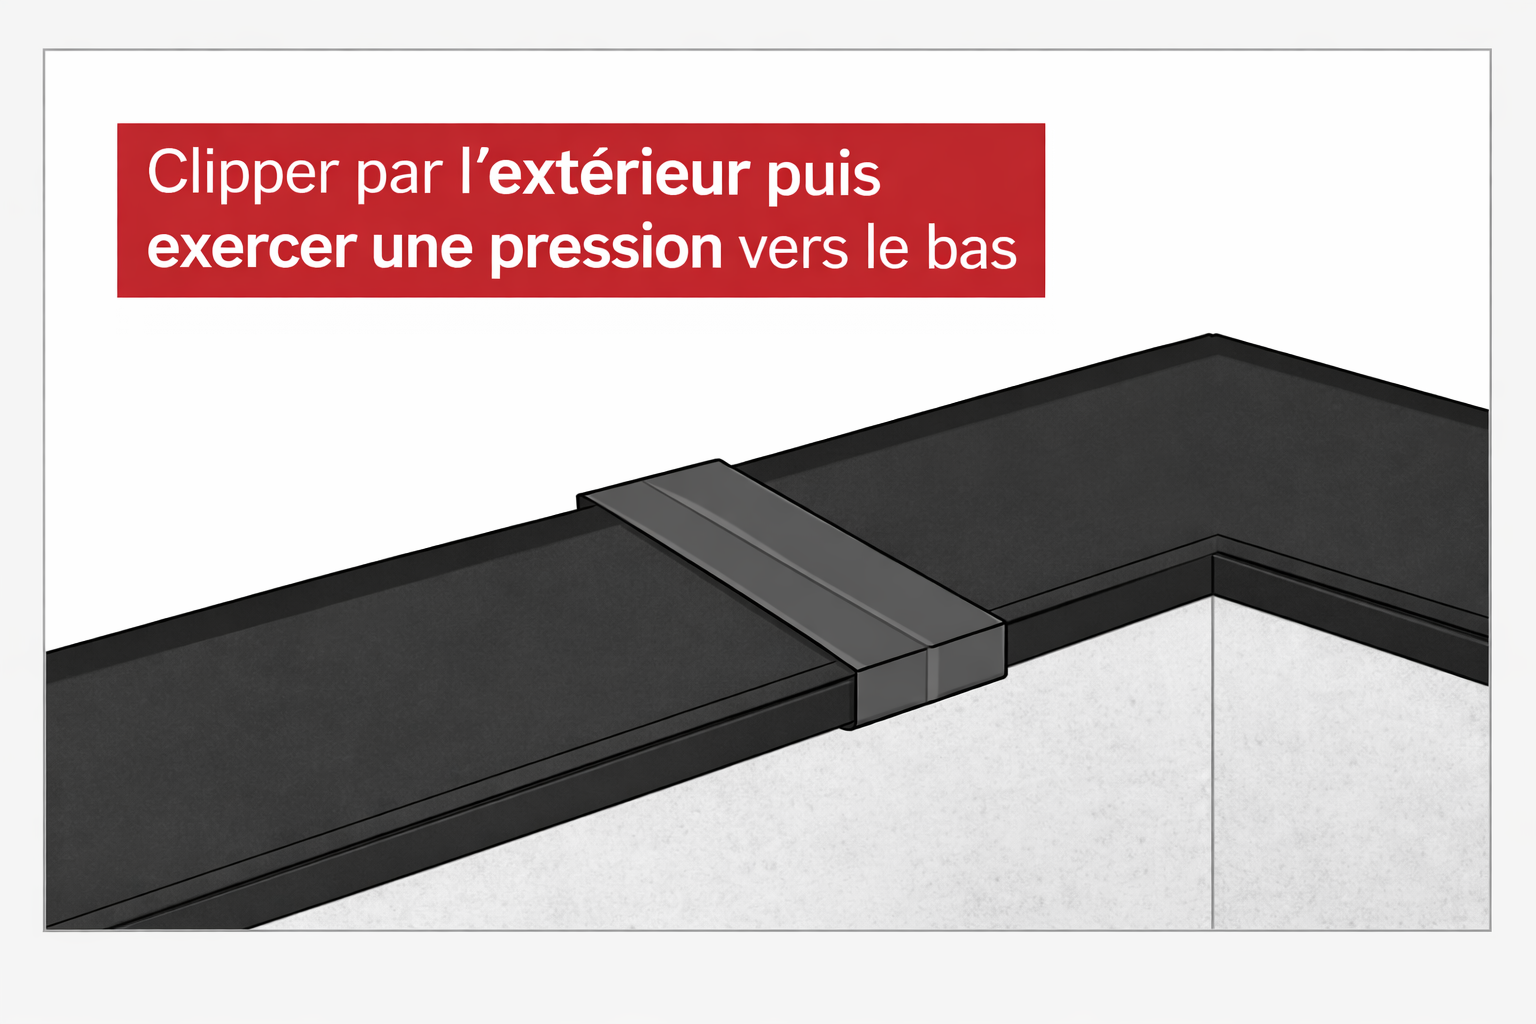
6. Clipping the coping |
|
Engage the coping onto the first bracket starting from one end. Clip firmly onto each grooved bracket until the click of engagement. Use a rubber mallet if necessary to avoid deforming the piece. 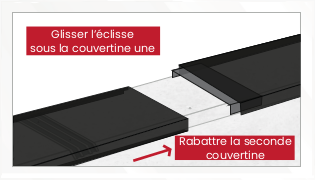 |
|
7. Installing a second coping |
|
Position the second coping ensuring sufficient overlap with the first (minimum 30 mm recommended). Check alignment before clipping onto the next brackets. 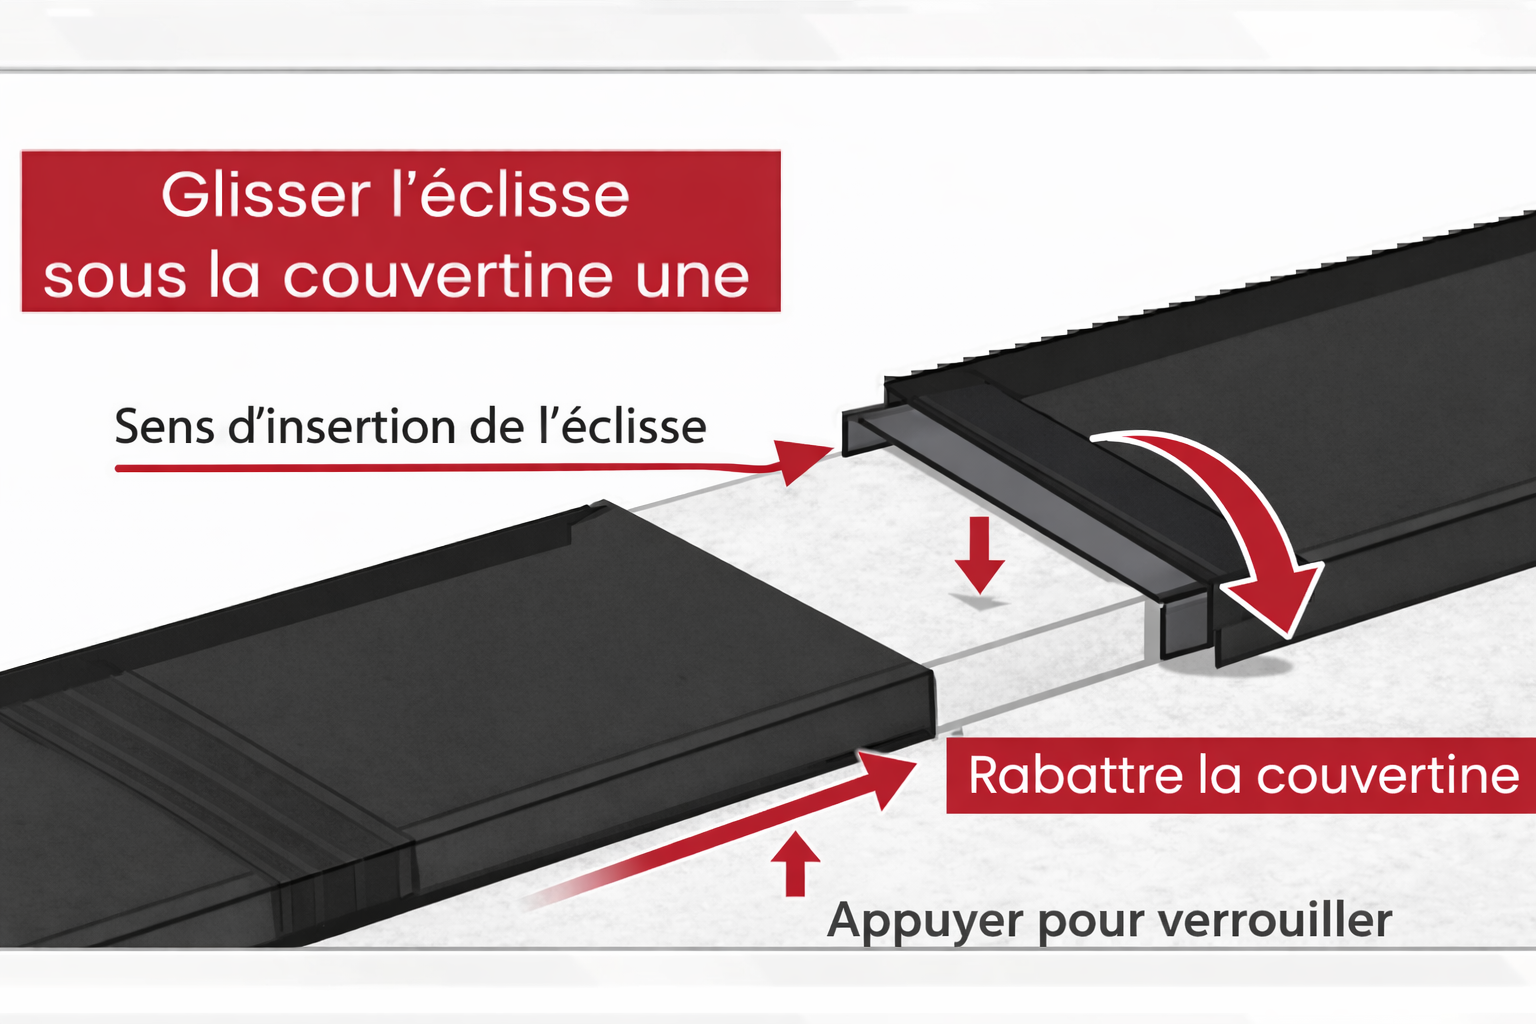 |
|
|

|
9. Adding end caps |
|||
|
Finish the ends with closure end caps to prevent water infiltration and insect entry. Push together until fully engaged.
|
|
✅ Summary — 9 installation steps
|
|
Need custom copings? CONFIGURE MY COPING
|
|
Suisse Pliage — Installation guide INSTALLATION OF A FLAT PARAPET COPINGTechnical sheet — step-by-step installation for building professionals. |
|
📋 Technical data sheet Complete installation procedure for a flat parapet coping with clip-on system on grooved brackets. |
|
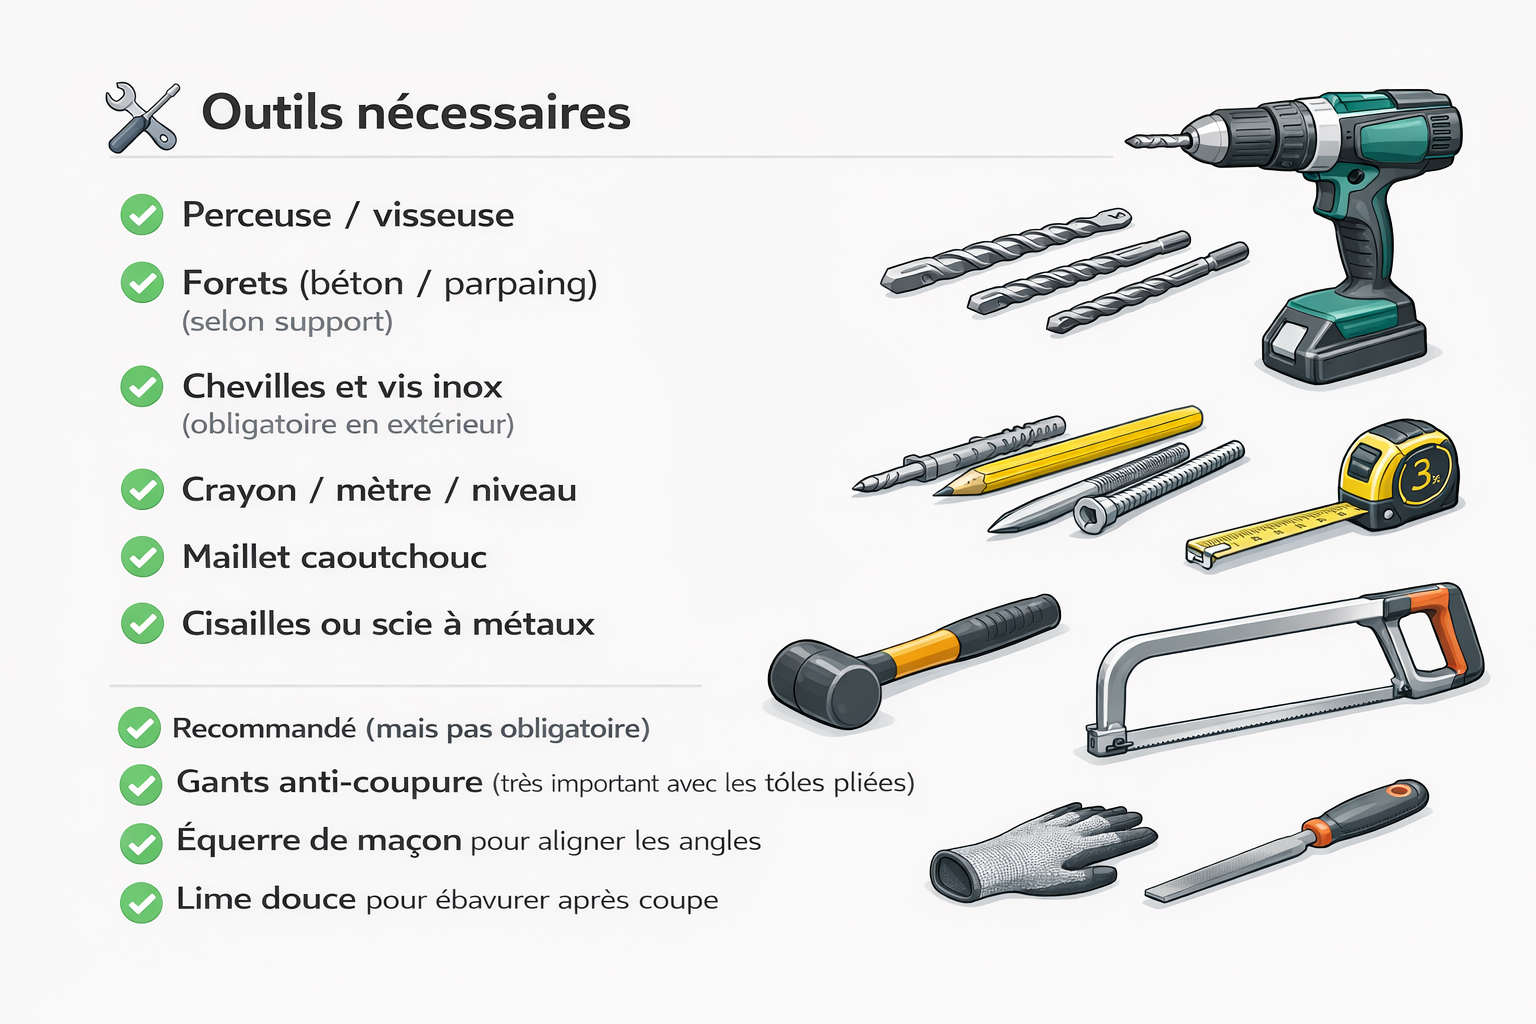
🔧 Required tools ► Drill / screwdriver ► Drill bits (concrete / block) ► Rawlplugs and stainless steel screws ► Pencil / tape measure / level ► Rubber mallet ► Tin snips or hacksaw |
|
📐 General view |
|
Part 01 ⚒ BRACKET INSTALLATION |
|
1. Clean the surface |
|
Remove dust, debris and loose material. The surface must be clean and sound before any fixing. 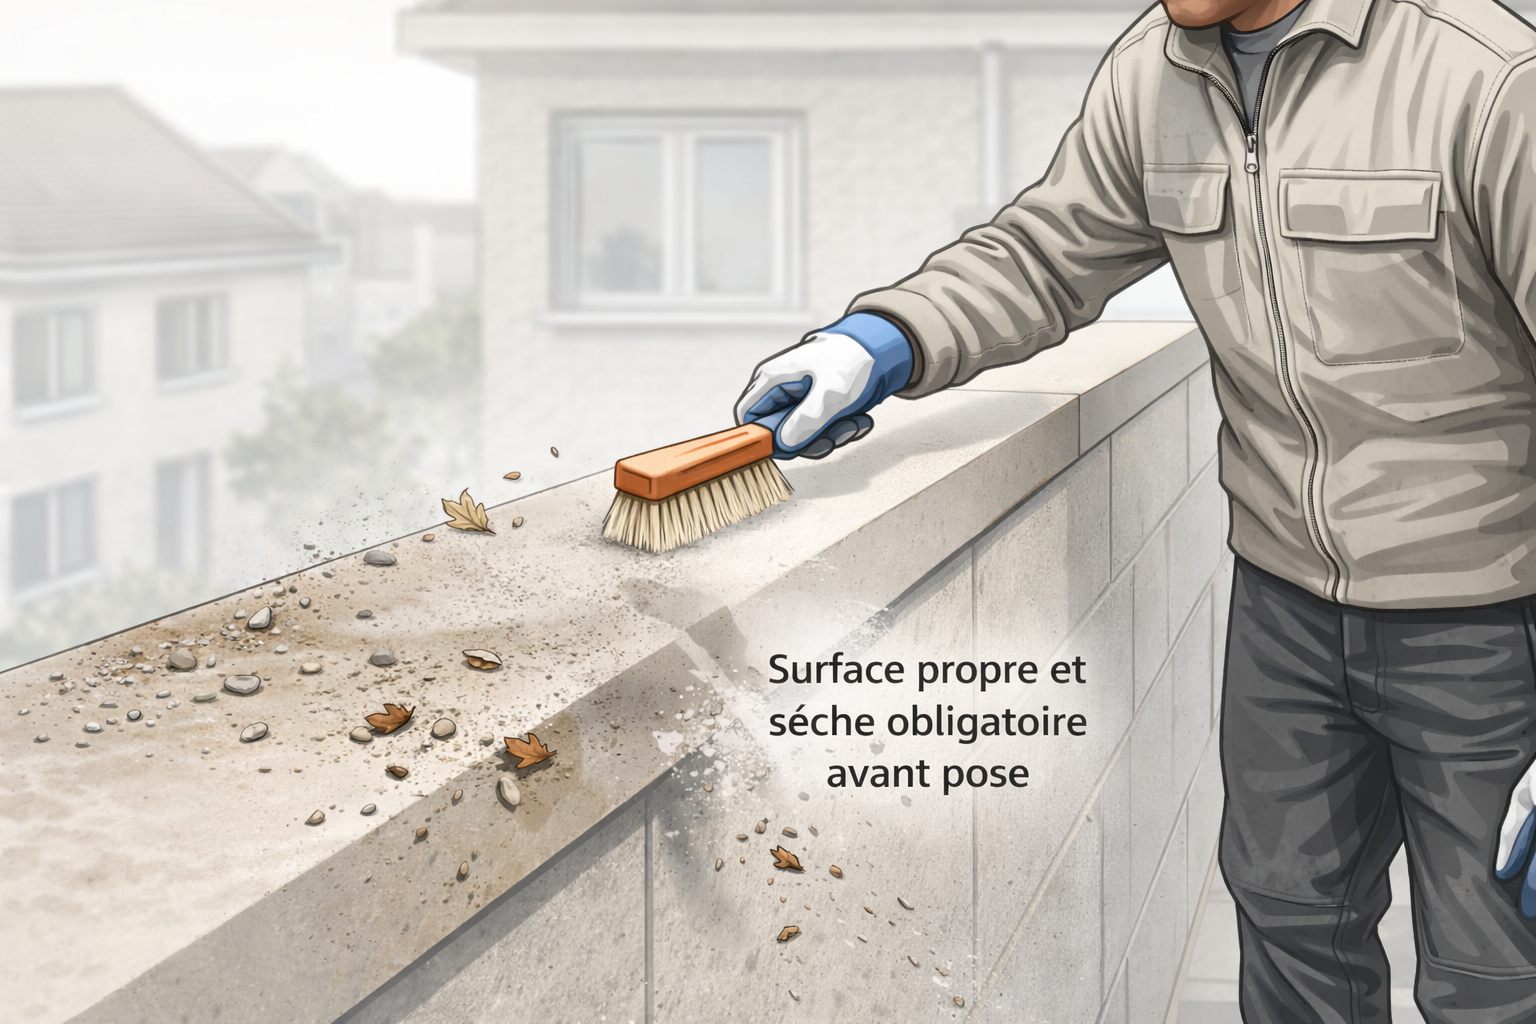 |
|
2. Position the angle and mark the ends |
|
Position the coping angle at the end. Mark the bracket positions along the parapet with a pencil. |
|
3. Bracket positioning |
|
Position the grooved brackets according to the markings. Check alignment and plumb before drilling.  |
|
4. Drilling brackets and wall |
|
Drill through the bracket and wall simultaneously using a bit suited to the material (concrete, block, brick). 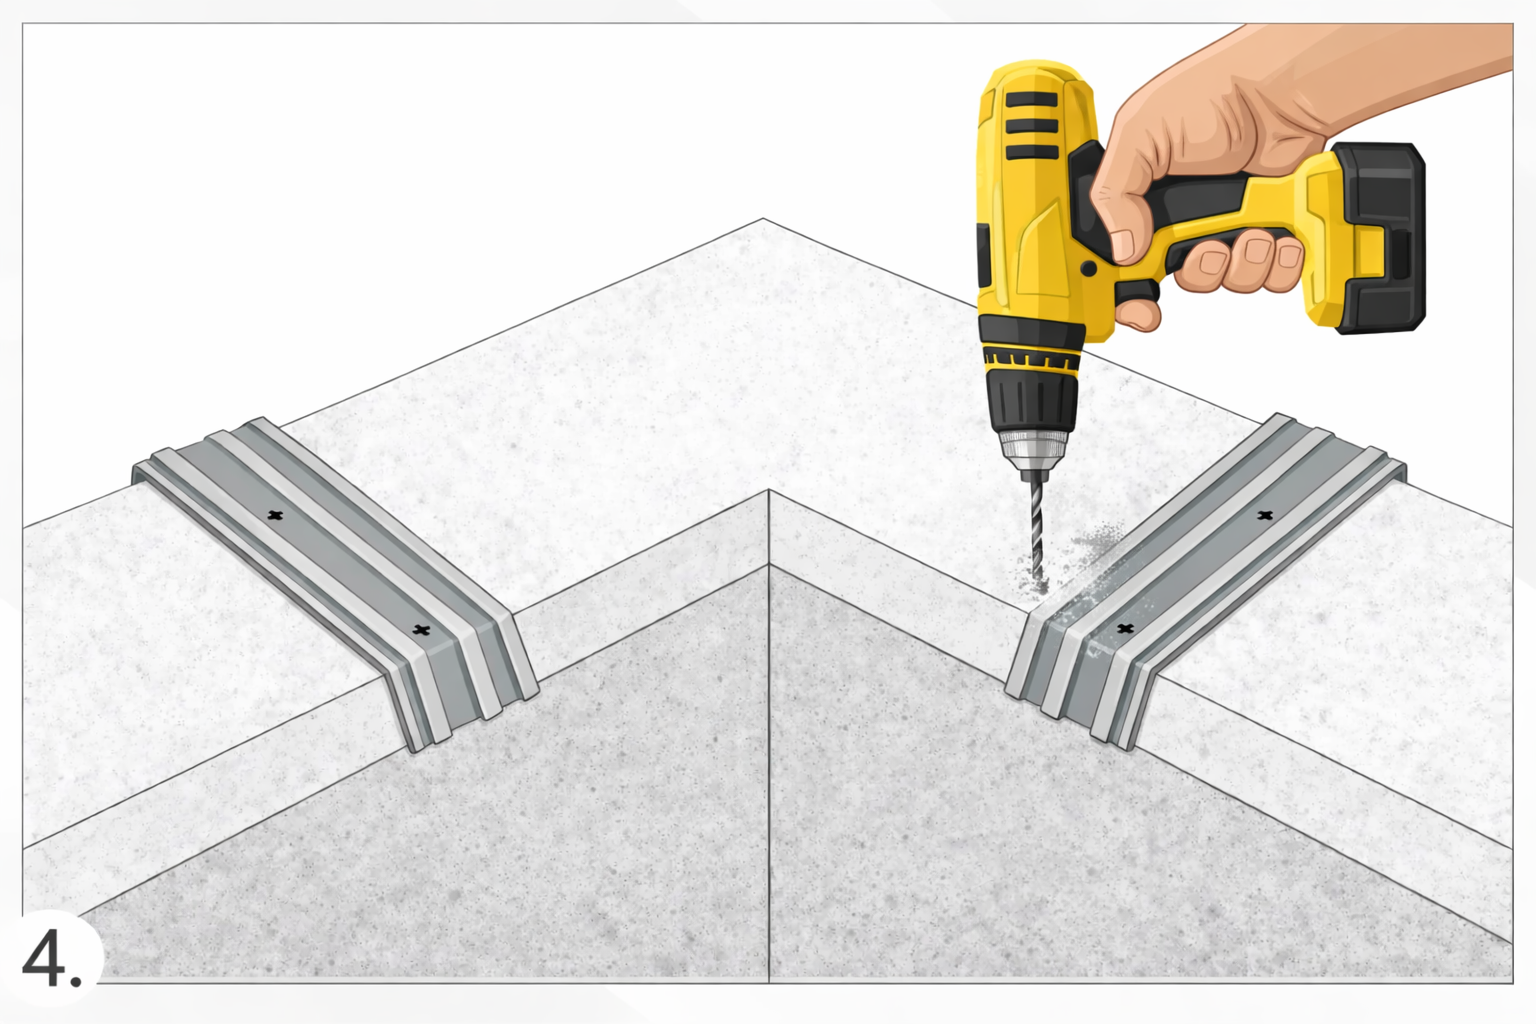 |
|
5. Insert rawlplugs and screw |
|
Insert rawlplugs into the drilled holes. Secure the grooved brackets firmly with stainless steel screws. 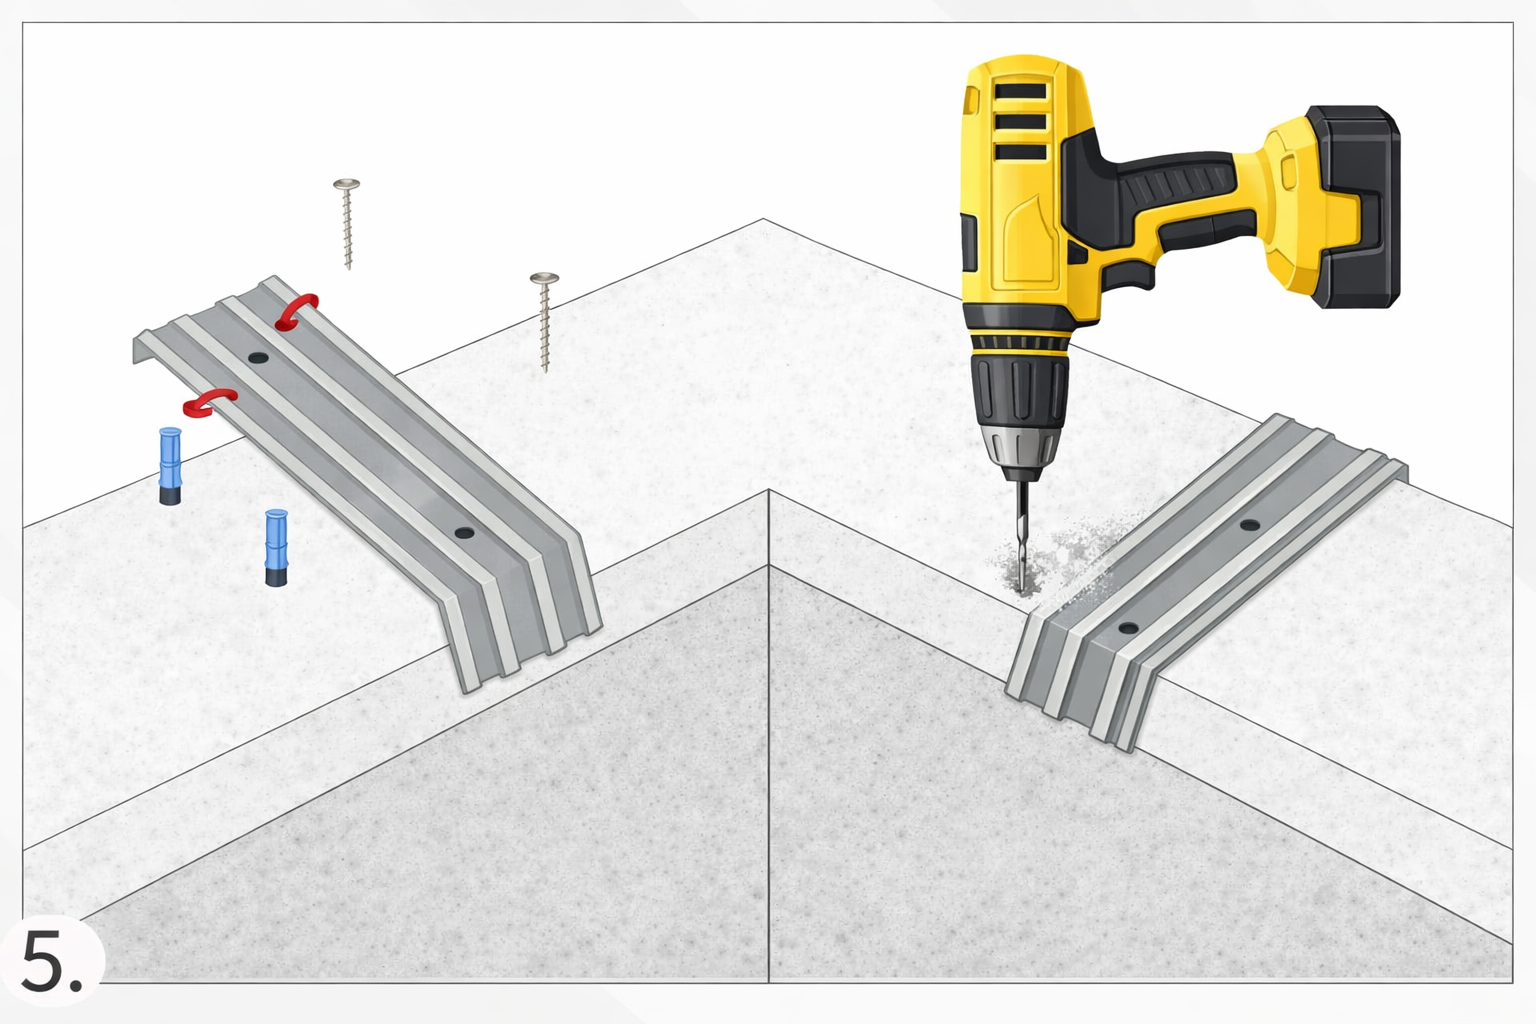 |
|
💡 Bracket spacing ► Every 1.50 m for copings of 3 m ► Every 1.00 m for copings of 2 m or less |
|
Part 02 🏠 COPING INSTALLATION |
|
6. Clipping the coping |
|
Engage the coping onto the first bracket. Clip firmly until the click. Use a rubber mallet if necessary. |
|
7. Installing a second coping |
|
Minimum overlap 30 mm recommended. Check alignment before clipping. |
|
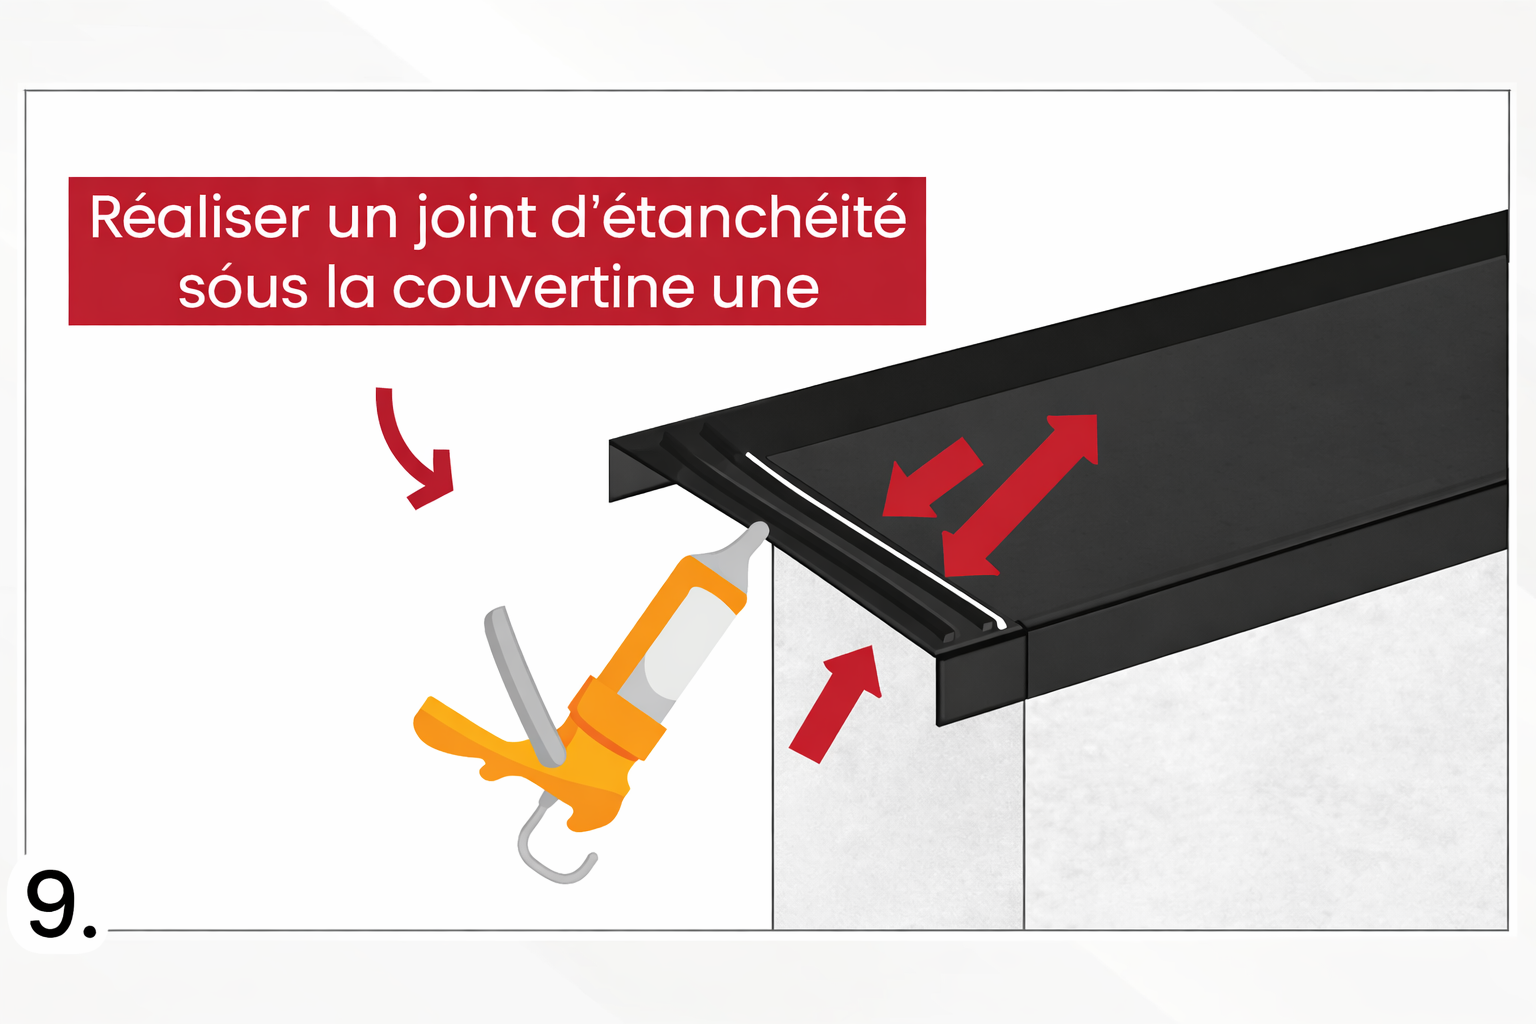
8.1 External joint cover |
|
Place the external joint cover over the junction to ensure waterproofing and conceal the expansion joint. 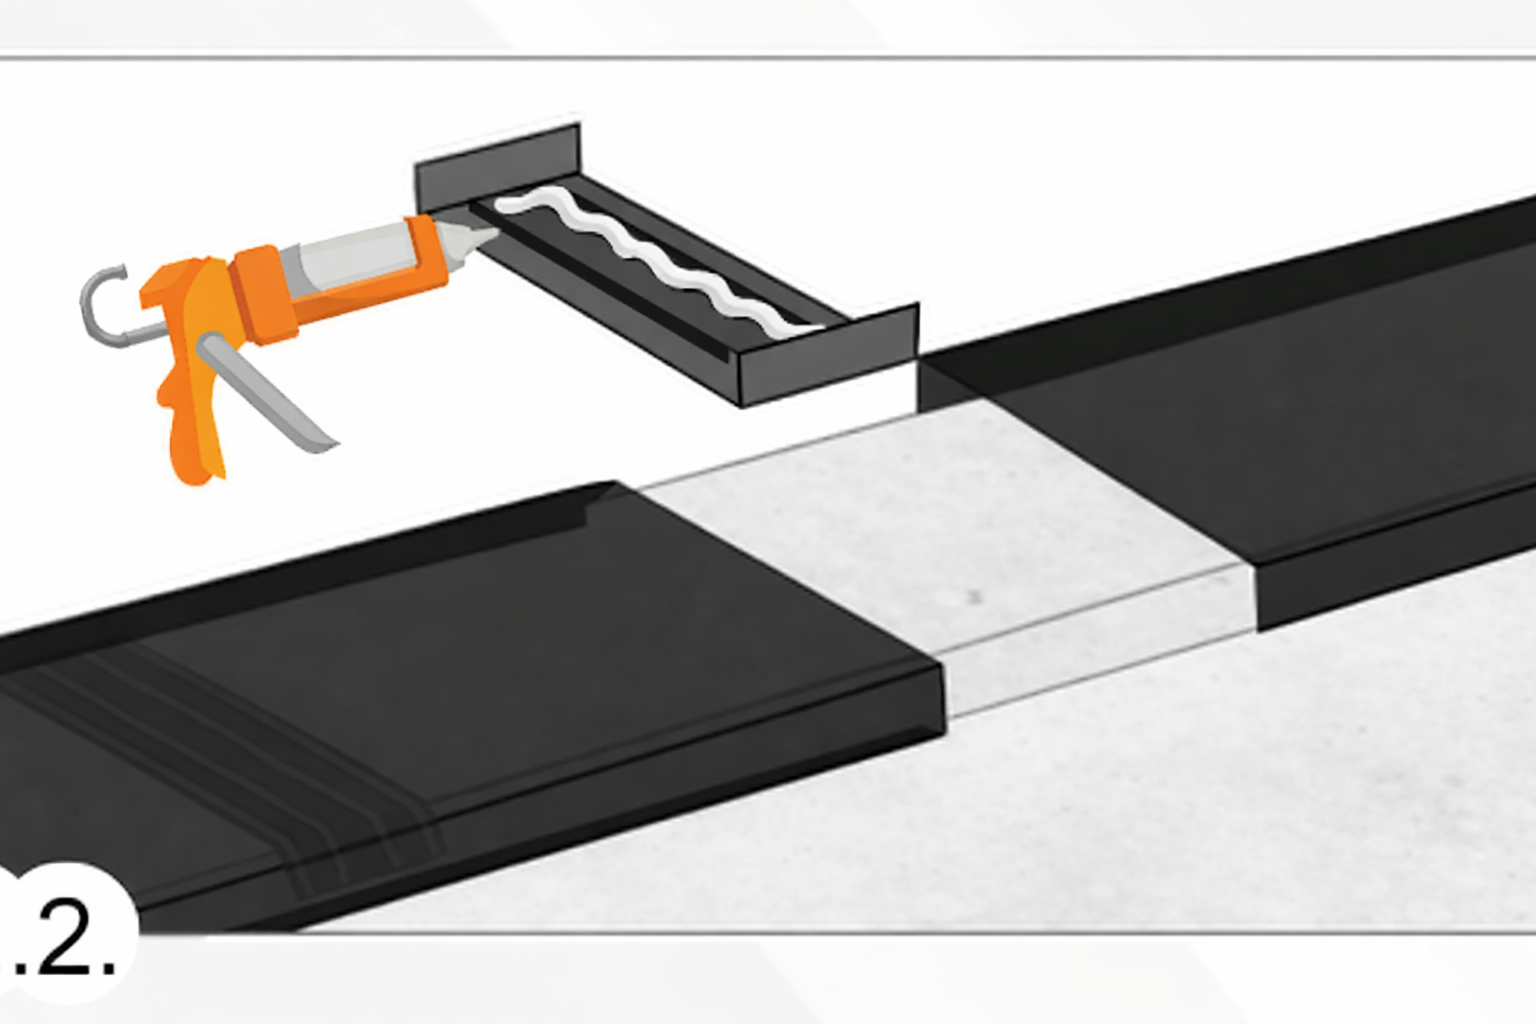 |
|
8.2 Internal joint cover (alternative) |
|
More discreet alternative: inserted inside the profile. 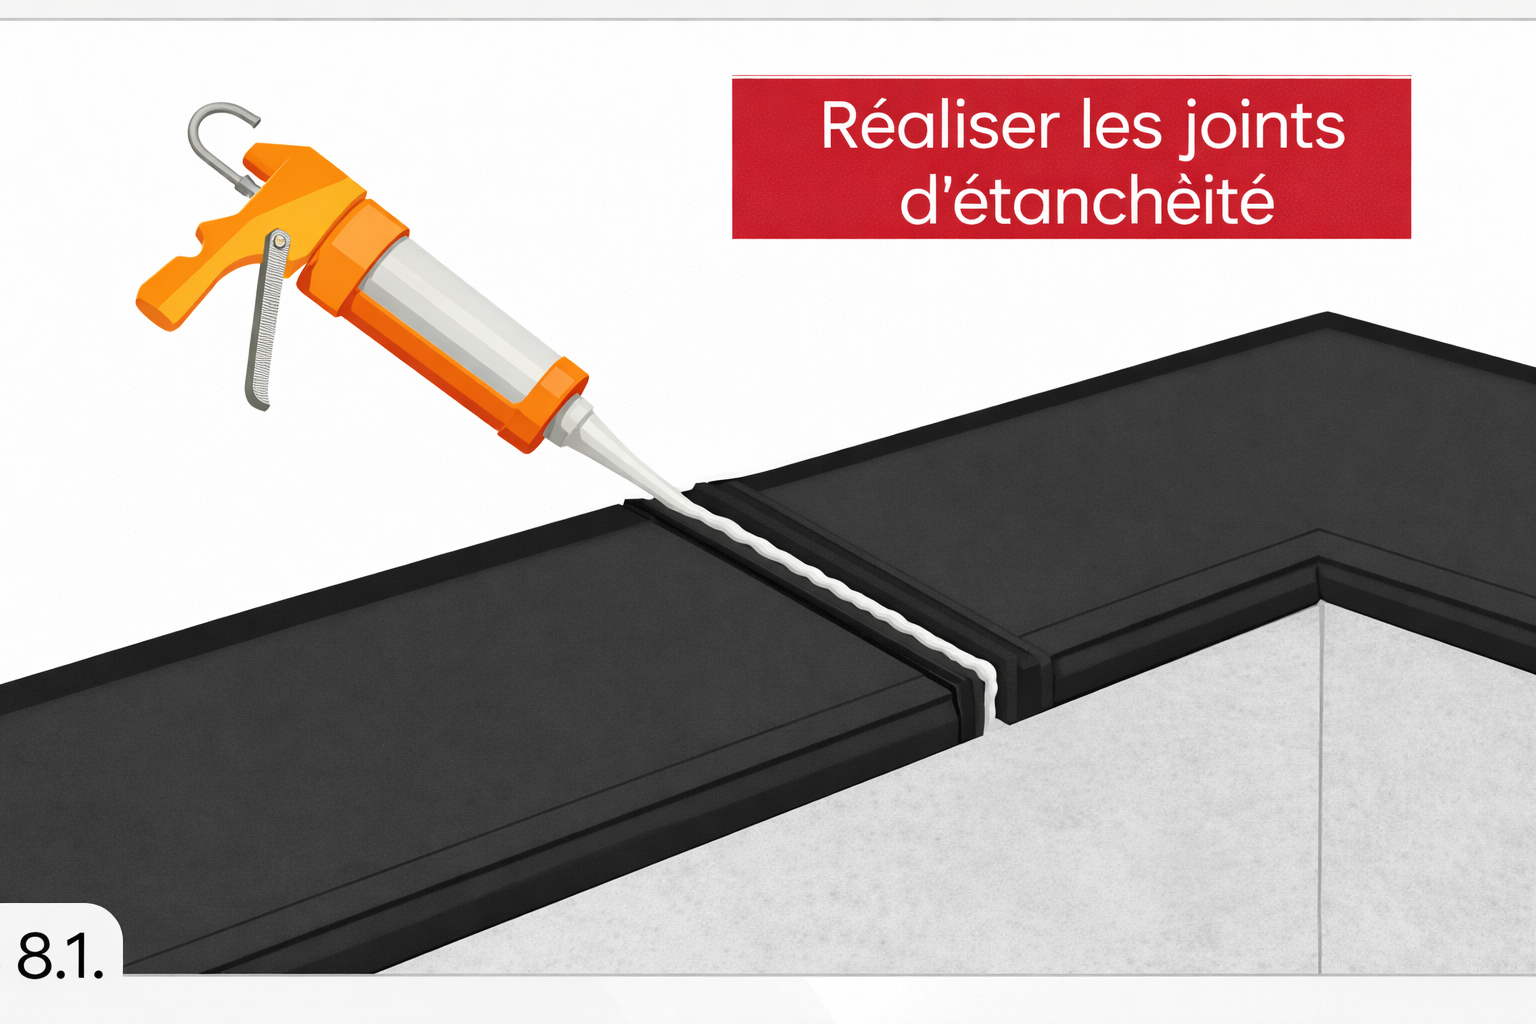 |
|
9. End caps |
|
Finish the ends with closure end caps. Push until fully engaged. 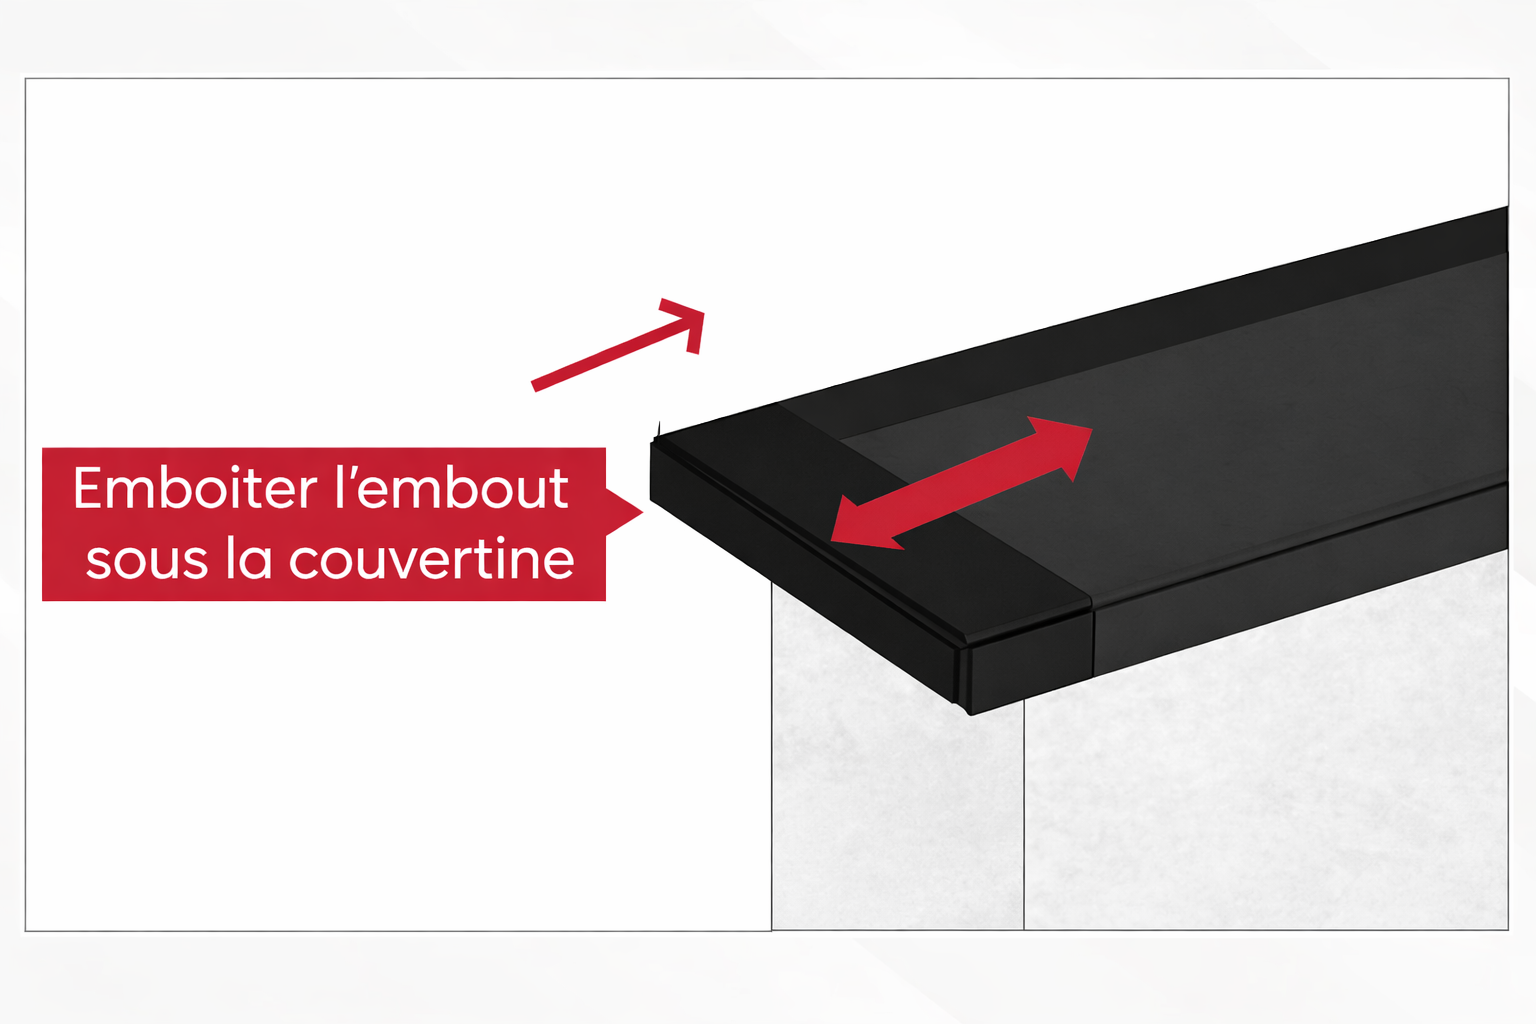 |
|
✅ Summary — 9 steps
|
|
Need custom copings? CONFIGURE MY COPING
|